Category: AI & Tech Tutorials | Author: Taazamind Editorial Team | Last Updated: June 2025
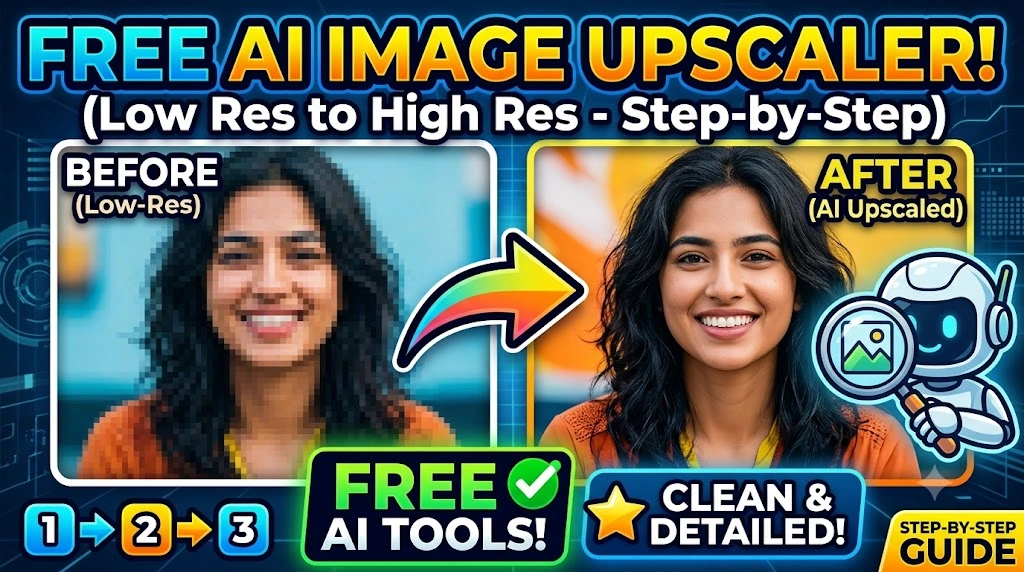
You took a screenshot, downloaded an old photo, or exported a graphic — and it looks terrible at full size. Blurry edges, pixelated faces, and that horrible “mosaic” effect that makes images look like they were photographed through a shower door. If you’ve tried dragging the image into Photoshop and hitting “resize,” you already know that traditional upscaling just spreads the existing blur across a larger canvas. It does not add the detail your image is missing.
The root cause is almost always one of three things: the original file was compressed too aggressively (JPEG artifacts), the image was captured at a very low sensor resolution, or it was exported at the wrong scale for its intended use. Whichever the case, AI-based upscaling solves this differently from classic interpolation — it actually predicts and reconstructs missing pixel data using deep learning models trained on millions of images.
This guide walks you through four free, tested tools that handle AI upscaling well, covering both browser-based options and offline software for privacy-sensitive work.
Technical Specifications
| Technical Detail | Specification / Requirement |
|---|---|
| Target Platforms | Windows 10/11, macOS 12+, Any modern browser |
| Recommended Input Formats | JPG, PNG, WEBP |
| Recommended Input Resolution | 50px–1000px wide (ideal for 2×–4× upscale) |
| Upscale Factor Supported | 2×, 4×, 8× (tool-dependent) |
| Difficulty Level | Beginner to Intermediate |
| Estimated Time Per Image | 30 seconds – 5 minutes |
| Internet Required | Yes (for browser tools), No (for local tools) |
| Cost | Free (with limitations on some platforms) |
Method 1: Upscale in Your Browser Using Upscayl Cloud or Let’s Enhance
Browser-based tools are the fastest entry point. No installation, no account required for basic use — you just upload and download.
Recommended tool: Let’s Enhance (free tier: 10 credits/month) or Upscayl Web
- Open your browser and go to
letsenhance.ioor the Upscayl web app. - Click the upload area or drag your image file directly onto the page. Both tools accept JPG, PNG, and WEBP up to around 5MB on the free tier.
- Select your upscale mode. Let’s Enhance offers “Smart Enhance” for general photos and “Digital Art” for illustrations or screenshots. Pick the one matching your image type — this choice significantly affects output quality.
- Set the scale factor. For most use cases, 2× or 4× is sufficient. Going to 8× on a very small source image can introduce hallucinated textures that don’t match the original content.
- Click Process or Upscale. Processing typically takes 15–60 seconds depending on server load.
- Download the output image and compare it side-by-side with your original at 100% zoom.
Method 2: Use Upscayl Desktop App for Unlimited Free Upscaling (Offline)
Upscayl is a fully open-source, free desktop application that runs AI upscaling entirely on your local GPU or CPU. No upload limits, no watermarks, no accounts. It uses Real-ESRGAN and similar models under the hood.
- Download Upscayl from upscayl.org and run the installer for your operating system (Windows, macOS, or Linux packages are all available).
- Launch the app after installation. On first run it will download the default AI model (around 65MB) — make sure you have an active internet connection for this one-time step.
- Click “Select Image” in the left panel and choose your low-resolution file.
- Choose an AI model from the dropdown. For photographic images,
realesrgan-x4plusworks best. For anime-style art or flat illustrations, switch torealesrgan-x4plus-anime. - Set the output scale to 2× or 4×. For very small images (under 100px wide), 4× gives noticeably better results than 2×.
- Select your output folder, then click Upscale Image. Processing time depends on your hardware — a dedicated GPU can finish a 500px image in under 10 seconds, while CPU-only processing may take 1–3 minutes.
- Open the output folder once the progress bar completes and review your result.
Method 3: Use Adobe Express Free Tier for Quick Social-Ready Upscaling
If your upscaled image is ultimately headed for Instagram, a blog header, or a social post, Adobe Express handles the upscale-then-resize workflow in a single place.
- Go to adobe.com/express and sign in or create a free account (the free tier includes AI upscaling).
- Click “Edit a photo” from the home dashboard and upload your low-resolution image.
- Navigate to the “Enhance” tab in the right-hand panel.
- Click “Upscale” — Express uses Adobe’s Firefly-backed AI to increase resolution. The free tier supports up to 4× upscaling on images up to 2000px per side.
- Adjust sharpening and noise reduction sliders if fine details look over-smoothed. AI upscalers sometimes oversoften skin or fabric textures — pulling the sharpening slider to around 30–40% usually recovers edge clarity.
- Export your file using the download button. Choose PNG for transparency or graphics and JPG for photographs where file size matters.
Method 4: Batch Upscale Multiple Images Using Topaz Gigapixel AI Trial or BSRGAN CLI
When you need to process a folder of 20, 50, or 200 images, manual browser tools become impractical. Two solid options exist here.
Option A — Topaz Gigapixel AI (30-day free trial):
- Download the Gigapixel AI trial from topazlabs.com. The trial is fully functional with no output watermarks.
- Drag and drop your entire image folder onto the app window. It accepts batch imports natively.
- Set a global scale factor (2×, 4×, or 6×) and choose an AI model. “Standard” mode works for most photos; “Low Resolution” model specifically targets compressed JPEG images that have blocking artifacts.
- Click “Start Processing” and let the batch run. Output goes to a subfolder automatically.
Option B — BSRGAN via command line (completely free, open-source):
- Install Python 3.9+ and clone the BSRGAN repository from GitHub (
git clone https://github.com/cszn/BSRGAN). - Install dependencies by running
pip install -r requirements.txtinside the project directory. - Place your images inside the
testsets/RealBSRGANfolder. - Run the inference script:
python main_test_bsrgan.py. Results will appear in theresultsfolder.
Frequently Asked Questions
Does AI upscaling actually recover real detail, or does it just guess?
AI upscaling does involve informed prediction — it doesn’t magically retrieve data that was never captured. What it does is use a neural network trained on millions of high-resolution images to reconstruct statistically plausible detail based on surrounding pixel patterns. For faces, text, and natural textures, results are often indistinguishable from original high-resolution captures. For very small images (under 50px wide), the model has too little data to work from, and results will look over-smoothed or artificially textured.
What is the best free AI image upscaler for Windows in 2025?
Upscayl is the strongest option if you want unlimited, watermark-free upscaling with no internet required after the initial model download. It uses Real-ESRGAN models and supports GPU acceleration on both NVIDIA and AMD cards. For occasional single-image use without any installation, Let’s Enhance or the free tier of Adobe Express are both solid alternatives.
Can I upscale an image more than once to get even higher resolution?
You can, but the quality gains diminish sharply after the first pass. Running a 4× upscale twice (to get an effective 16× increase) tends to produce over-smoothed images with hallucinated textures that look artificial. A single well-chosen upscale factor — typically 4× for very small sources — will outperform stacking multiple passes. If you genuinely need extreme resolution, start from the highest-quality original source you can obtain rather than re-upscaling an already upscaled image.
Published on Taazamind.com | Helping you get real answers to real tech problems.